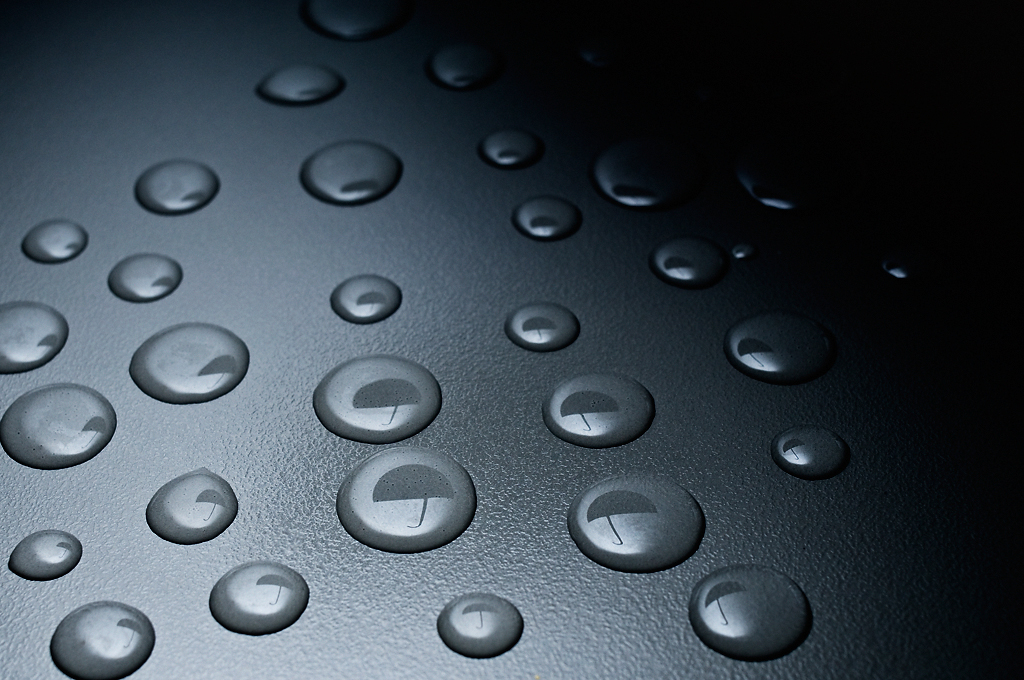
This picture is not my idea, but since I saw it the first time, I could not understand how it was shot. Unfortunately I don't remember where I saw it.
While watching TV today, I got a revelation. This post is all about how I shot it.
Setup
First of all, I needed a simple picture of an umbrella. A Google search gave me that. I printed it and glued it to a piece of cardboard. With a sharp knife, I cut out the cardboard in an umbrella shape, and glued it to a piece of white paper. My wife has a lot of scrapbook equipment, so this task wasn't to difficult.
This paper would be the diffuser for this shot, with the umbrella working like a kind of inverted gobo.
I headed over to the kitchen, and set up the camera on a tripod near the kitchen bench. To leave the DoF as large as possible, I wanted to shoot vertically, or at least as much as the tripod would allow. The slave flash, a SB-600, was mounted on a microphone stand so that it would light the bench directly from above. With a teaspoon I made small water drops on the bench where the camera pointed.
The other side:
Exposure
SB-600: 24mm zoom at 1/16 power
Exposure: 1/250 sec @ f/8, ISO 200
Lens: Nikkor 35mm f/2D AF
Camera: Nikon D300
Shooting
I held the paper with the umbrella over the water drops so low as possible, without entering the camera's field of view. I wanted as much of the white paper surface to reflect in the water drops, and since they are curved on top, it required me to hold the paper as close as possible to avoid to many dark areas on the drops.
With the remote shutter cable I fired a couple of shots.
Post-processing
This is the original raw-file:
I quickly realized, after seeing it on the computer, that the umbrella spots appeared too weak. In the raw converter (Adobe Camera Raw) I increased the clarity and constrast, but no luck. I hoped that Photoshop CS4 would help me.
I added a curves adjustment layer and started messing with the curve. I wasn't too happy with the results, until I discovered the little hand symbol in curves box. With this hand selected, I could click and drag any area on the picture, which would make the color tone of that area darker or lighter. By clicking one of the umbrellas, I ended up with this curve (the hand symbol is visible on the upper right hand corner):
I'm by no means an expert in curves, so I doubt I would find a similar curve only by playing with the anchor points. I have been raised to believe that the curve should appear as a nice S, but there are exceptions, especially when my flash settings are way off...
I finished the post-processing with a crop and sharpening.
The result:


12 comments:
Another great piece of work from you!
That is just fantastic - just fantastic ! Really well done
Zetson, you are an endless source of inspiration. Thank you for explaining all the process!
really enjoying your blog, thanks for sharing dude!
Your work is incredible!!!
Good job well done- I've seen this set-up before too. So I had a dig through my book shelve and found it in Michael Freeman's "close-up photography". Thought you might be interested.
Just discovered this blog through DIY Photography. This is amazing. Love the walk throughs. Keep it up!!
Hej,
Nu har jag läst igenom hela din blogg. Riktigt jävla bra! Wonderful.
Följer dig och kommer att hämta inspiration från dig, då jag själv börjat med blixtfotografering nyss.
/Sebastian
Cool. Inspiring. Valuable. Educating.
Thanks a lot for sharing.
Keep it up, man.
I guess you saw this picture in a book.
The day after I read your blog post I reached page 104 in "The Photographer's Eye: Composition and Design for Better Digital Photos", and there it was. :)
Sensational idea. This shot goes on my "try that idea from FlashFrog"-List!
Well done!
Wow, dette var jo ikke annet enn fascinerende! Noe sånt har jeg aldri sett. Knallstilig! :)
Post a Comment