Friday, February 27, 2009

Great news: Part deux

Today another article I wrote was featured on a website called DIYPhotography.net. I think it's been an honor to contribute to this site, since it introduced me to creative flash photography about a year ago. Prior to that I had know idea that you could use multiple flashes, or even bounce them. DIYPhotography.net really gave me the inspiration to start experimenting with light.

The article on DIYPhotography.net is about how I took this "film noir" shot. It was more difficult than it looks. Click here to read the article.

What, me film noir?


Monday, February 16, 2009

If you can't beat them, join them

This picture is not my idea, but since I saw it the first time, I could not understand how it was shot. Unfortunately I don't remember where I saw it.

While watching TV today, I got a revelation. This post is all about how I shot it.

Setup

First of all, I needed a simple picture of an umbrella. A Google search gave me that. I printed it and glued it to a piece of cardboard. With a sharp knife, I cut out the cardboard in an umbrella shape, and glued it to a piece of white paper. My wife has a lot of scrapbook equipment, so this task wasn't to difficult.


This paper would be the diffuser for this shot, with the umbrella working like a kind of inverted gobo.

I headed over to the kitchen, and set up the camera on a tripod near the kitchen bench. To leave the DoF as large as possible, I wanted to shoot vertically, or at least as much as the tripod would allow. The slave flash, a SB-600, was mounted on a microphone stand so that it would light the bench directly from above. With a teaspoon I made small water drops on the bench where the camera pointed.


The other side:


Exposure

SB-600: 24mm zoom at 1/16 power
Exposure: 1/250 sec @ f/8, ISO 200
Lens: Nikkor 35mm f/2D AF
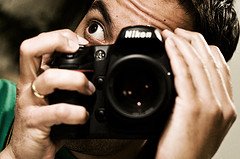
Camera: Nikon D300


Shooting

I held the paper with the umbrella over the water drops so low as possible, without entering the camera's field of view. I wanted as much of the white paper surface to reflect in the water drops, and since they are curved on top, it required me to hold the paper as close as possible to avoid to many dark areas on the drops.


With the remote shutter cable I fired a couple of shots.

Post-processing

This is the original raw-file:


I quickly realized, after seeing it on the computer, that the umbrella spots appeared too weak. In the raw converter (Adobe Camera Raw) I increased the clarity and constrast, but no luck. I hoped that Photoshop CS4 would help me.

I added a curves adjustment layer and started messing with the curve. I wasn't too happy with the results, until I discovered the little hand symbol in curves box. With this hand selected, I could click and drag any area on the picture, which would make the color tone of that area darker or lighter. By clicking one of the umbrellas, I ended up with this curve (the hand symbol is visible on the upper right hand corner):


I'm by no means an expert in curves, so I doubt I would find a similar curve only by playing with the anchor points. I have been raised to believe that the curve should appear as a nice S, but there are exceptions, especially when my flash settings are way off... 

I finished the post-processing with a crop and sharpening.

The result:

If you can't beat them, join them

Friday, February 13, 2009

Zetson's Valentine Wine (tm)

I'm not going to lie. This shot wasn't planned to be a Valentine's Day photo. All I wanted to do was to shoot a bottle again. Luckily, the first bottle I found was shaped like a heart. It's has been laying around here for years, and today was the first time I actually noticed this shape.

Setup

I did try out several ways to light the bottle with umbrellas. I put one umbrella on each side with a green background, but I didn't think it looked good at all. It may be because of the background, but also the ribs in the umbrellas. They just show too good. I really wanted pair of softboxes! The highlights didn't work with me either. The bottle has a lot of curves in the glass, throwing reflections all over the place. Here are two examples on how ugly these photos looked:


Then I started thinking about lighting the bottle from below, removing the need for umbrellas. I took out a glass plate from one of the kitchen cabinets (that was pretty scary, having Friday 13th in mind...) and put it on top of a cardboard box. I had covered the inside of this box with black cloth to minmize the reflections. In the bottom I put a SB-600 with red color gel and a home-made snoot.


By bouncing the commander flash in the ceiling I could trigger the SB-600 in the box.

As a background I just reversed the green background, and voila, a white background I could do whatever I wanted with. I placed another SB-600 in front of this white paper, also with a red color gel.


Exposure

Backround flash: 1/128 power, 85mm zoom
Box flash: 1/8 power, 24mm zoom
Camera: 1/250 sec @ f/8, ISO 200
Lens: Tamron 90mm f/2.8 macro
Camera: Nikon D300

Shooting

I was completely surprised to see the heart-shape inside the bottle. I knew that the bottle was a big heart, but I didn't expect to get a nice heart inside it. After some trial and error, I found a camera angle that made the inside-heart look most heart-alike. (Has this sentence ever been written before?) Changing the angle and/or camera height just a little would ruin the heart, so I'm glad I found it!

This was the best shot, IMO (the raw file):


I imported the file to Photoshop and increased the contrast a little with curves and removed some of the dust spots and reflections in the glass. Finished with a crop and sharpening.

The result:

Zetson's Valentine Wine (tm)

Happy Valentine's Day!