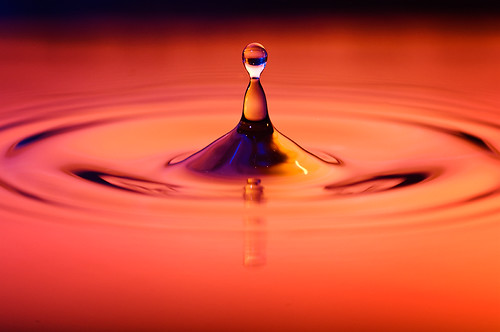
There are two types of photographers: Those who have shot water drops and those who will.
Idea
Two days ago I saw an episode of Time Warp on Discovery Channel, a program were they slow things down. They are using a high-speed HD movie camera to capture movement with a frame rate of 10,000 frames per second. It's a amazing! Well, in the mentioned episode they shot water drops and I got a few ideas. Here's my shot at it.
Setup
First of all I needed something to pour water in, and it had to be black. I found a deep tray in the oven and put it on the kitchen bench. I also needed a white reflector. In lack of a stiff white cardboard, I glued a white sheet of paper on one of my wife's paintings (on the the reverse side) and set it aslant behind the bench, using a string for support. Next to the tray I placed a Nikon SB-600 flash unit.
I originally inteded to buy a pipette/eye dropper of some sort to make the water drops but luckily I read a tip which would make the shooting process much more efficient. It involved filling a plastic bag with a little bit of water and hanging it above the tray. Then I just had to puncture it with a small needle. This would release a smooth stream of water drops, falling with equal intervals and, more importantly, they would hit the water surface on the same spot - every time.
I mounted the camera with a Tamron 90mm f/2.8 macro on the tripod and connected a remote shutter cable to avoid camera shake. When I pointed the camera against the water, I had to make sure that the field of view stayed inside the reflection of the white paper. A Nikon SB-800 flash was used as a commander for the SB-600 slave flash.
This is how the setup looked initially:
Focusing
The setup was finished, it was almost time to shoot. I was amazed how quickly this was done. It's wasn't very painstaking. But before I could shoot gorgeous water drops I had to lock the focus. Since timing is just as important as exposure (or may be more important) I didn't have time to focus on the water drops each time I took a picture. Most likely, the camera wouldn't be able to focus at all. To configure the focus, I punctured the plastic bag with a needle. The water drops came out about one second apart. I placed a contrasty object (pen with letters) right where the drops hit the surface and focused automatically. Then I switched to manual and the focus would be close to perfect most of the time.
Exposure
The next I had to do was find proper manual settings for the camera and the flash. Highest sync speed for the shutter was mandatory (1/250 sec) and I definitely wanted a narrow aperture to achieve as much depth of field as possible without risking diffraction. Since I was planning to use color filters on the flash, it would be necessary to adjust the output depending on the transparancy of the filter.
Flash: 1/8 power (1/4 for dark filters), 24mm zoom
Exposure: 1/250 sec, f/11, ISO 200
Lens: Tamron 90mm f/2.8 macro
Camera: Nikon D300
Shooting
With a red color filter on the flash, I was ready for the fun part, and believe me: It was a lot of fun. It felt like I had endless attempts to get a good shot. If one drop shot was bad, I just had to wait another second for the next drop to hit the surface. I didn't have to think about how and where the drops were released, which made the shooting process a relaxing piece of work. I could instead concentrate more on the lighting. The first shots looked pretty cool, and thought it would be appropriate to add another flash to get additional colors in the shot.
Straight out of the camera (SOOC). Red back lighting.
I set up a lightstand on camera left with another SB-600 slave flash and pointed it at the background. Same output as the other slave flash. I used different combinations of color filters on the flash heads. Some combinations looked better than others. I definitely fell in love with the blue-red combo and blue-orange. By setting up another flash, I changed the properties of the backlighting to a color mix/gradient, while at the same time lighting up the drops with a different color.
SOOC-raw file. Dual color lighting: Red on the background blue camera left
I did also put the camera closer to the action, but that resulted in an extremely narrow depth of field which rendered the preset focus useless. Still I got some lucky "sharp in the land of the soft" shots.
SOOC-raw file. The closest I could get with the Tamron macro lens. This picture shows the water drop as it bounces off the surface.
Post-processing
Since the colors are so vibrant and shapes are contrasty, very little processing was needed. I only increased the vibrance and contrast just a tad in Adobe Camera Raw. I also removed some tiny dust spots and lens flares. Here are some of the results I'm most satisfied with, in terms of sharpness, colors, lighting and shapes.
Epilogue
Those of you who are familiar with the Tamron 90mm f/2.8 macro lens know that the lens extends quite a bit when shooting close-up shots. During the focusing prcoess prior to the closest shots, I had to move the lens very close to the water. What do you think happened when the autofocus motor stared pushing the front lens element outward?
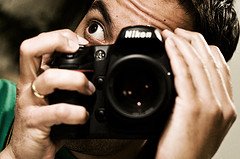
This is only a reenactment. No camera lens became wet during the taking of this picture. Only prior to.


