Sunday, October 19, 2008

Wet leaf

"Leaves" was the assignment theme this week at dPS. Generally, I don't like shooting flowers, but rules are to be broken. It's autumn, but up here most of the leaves are already rotten by now, so I had to find a subject inside. I wanted go for a minimalistic approach and trying do do something different (as usual...). Obviously, I wanted to use my strobes.

Getting the idea
While watching TV I noticed that the leaf of an orchid on the TV set was sort of bending downwards while looking straight at it. It looked pretty cool, so I decided to shoot it that way.

Trial and error
I took it to the kitchen table and wiped of the dust with a damp cloth. I placed a white sheet of paper to hide the distracting branches while at the same time creating a background. I mounted a snooted SB-600 overhead and took a photo with a 35mm lens at f/2.8:

The exposure and WB was pretty bad in this first shot, but regardless it looked extremely boring, so removed the paper instantly. Another problem was the ugly glare on the leaf.

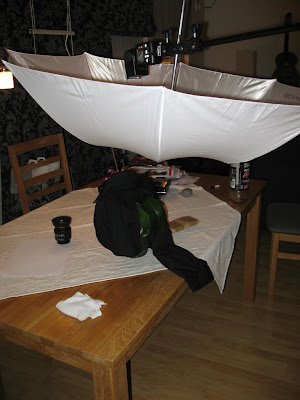
I took a black T-shirt and wrapped it around the plant for a low-key approach. I also mounted a translucent umbrella overhead to diffuse the light while changing to a 70-200mm lens to compress the field of view to get a more vertical look on the leaf.


The umbrella didn't work any better. The glare got worse. I recalled the thirsty rose setup and placed the snooted flash on camera left to see if the light would enhance the texture and shape of the leaf.


I thought it got much better. But the background was too bright, so I placed a cardboard box between the flash and the leaf to block the light on the background.


This is one of the advantages with working with strobes instead of natural light. You can shoot at high shutter speeds forcing the camera to only record nothing but flash light. At the same time this light is so concentrated that the edge of the cardboard box is enough to achieved a completely black background without any processing.


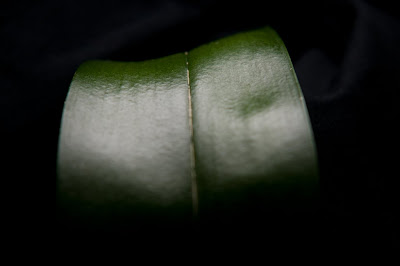
I got my strobe light as I wanted. To make it a little more interesting I sprayed some water on the leaf and took a couple of shots to determine the exposure. I wanted a pretty narrow DoF.

Exposure settings
Strobe: 1/8 power, 24 mm zoom
Exposure: 1/125th sec @ f/5.6, ISO 200
Lens: Sigma 70-200mm f/2.8 macro @ 160mm
Camera: Nikon D300

I took six shoots with different crops and ended up with this photo (processed RAW file):


Post-processing in Photoshop
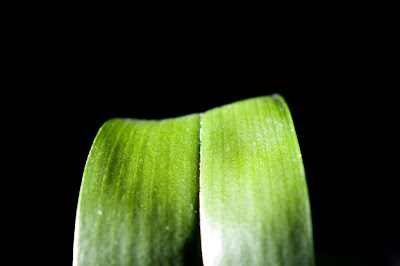
I know that it's advisable trying to get the final crop in-camera, but sometimes you just got to change your plans when looking at the photo on the monitor. I thought too much of the leaf was visble so I cropped about 30% of the lower part. I enhanced the green color with Selective Color and increased the contrast on the green channel in Curves. Used levels to brighten it up a little.

The result

Wet leaf


Conclusion
I regrett using a quite narrow aperture. I think it would look better with the entire leaf in focus. I did a test shot with one f-stop higher , but it looks like I had focused on the background, causing the subject to be blurry. I should also have experienced with cross-lighting (lighting from both sides) but that sounds like something to test in another post.

Thursday, October 16, 2008

The bubble resurrection

I've been literally living in a bubble the last week. All I can think about it getting a bubble shot that I'm at least satisfied with. This is the third blog entry about me shooting a bubble, almost like the You suck at Photoshop series. I think the videos are hilarious, and I love how the main character is slowly loosing his mind. Just like me with the bubbles.

In my previous post I promised I would never shoot another bubble shot again. But that was yesterday. Today I felt I was in a better mood and I didn't have to worry about smoking or thinking about the bubble assignment at dPS, which had closed by the time of shooting. I had carte blanche and no time pressure. I wanted to do a silhouette shot of the soap bubbles. I hadn't succeeded with this in an earlier photo shoot, but I suspected it had to do with the background being a little to dark and poor lighting.

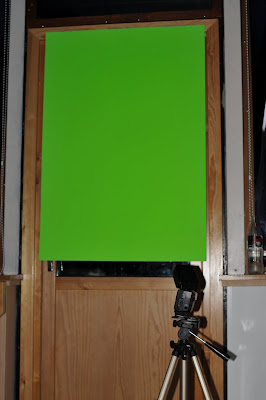
This time I wasn't going to shoot it at home, which lead to a fantastic  discovery. In a locker room I found a 100cm x 70cm cardboard with an intense green color. Ordinary people apparently regard this as "trash", since it was ready for the waste bin. Photographers however, see a background! I brought it the "studio" and hung it on the wall with tape. I also put a Speedlight SB-600 on a tripod and put it in front of the cardboard.


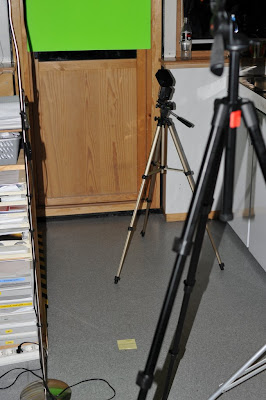
In the photo above you can see how I have twisted the flash head so that it points on the background but still the optical trigger sensor is pointing at the camera.

I sat the camera in portrait orientation on a tripod and locked the focus by focusing on a floorlamp that I had placed about 50 cm in front of the camera lens. Then I sat the lamp so that that it wasn't in the field of view. By doing this I could see where the point of focus was, by dragging an imaginary line from the lamp parallel with the camera's focus plane. On the photo below you can see the floorlamp on the left side, the camera tripod and the backlight strobe.


The setup was finished. I did a couple of test shots to adjust the exposure. I wanted a pretty fast shutter to freeze the bubbles and a medium aperture to have a little bit of playroom in the DOF. These are the settings I ended up with:

Backlight strobe: 1/64 power, 24mm zoom
Camera exposure: 1/125 @ f/5.6 ISO 200
Lens: Nikkor 50mm f/1.8D AF
Camera: Nikon D300


Instead of using that time consuming interval timer shot mode on the D300, I thought a five second self-timer would be sufficient since I wasn't going to be in the photo, but instead stand next to the camera while blowing the bubbles.

I brought up my new bottle of soap bubbles and stood right next to the camera on the right side. I pressed the shutter button and prepared myself for the blowing. I wanted most of the bubbles to be in the imaginary zone created by the floor lamp when the camera took the picture. That was easier than I thought. When two seconds remained I started blowing a calm and steady flow of small bubbles. For most of the shots, there were hardly any bubbles in the frame. I shot about ten shots in total and the photo below is the one I'm most happy with. This is the straight-out-of-the-camera version (RAW) turned back to landscape orientation:


I realized I had to crop it a little to remove the black area in the lower right corner. In Photoshop I didn't do much. I only duplicated the layer and added a gaussian blur by 6 px and changed the layer's opacity to 12%. That gave me a little more greens without destroying the gradients. Using the saturation slider caused just that.

The result is called:

Amobeas going into the light

Amoebas going into the light

Finally I'm happy with a bubble shot! I think the main problem in the previous bubble shots was that I was too caught up in shooting it as a selfportrait. A selfportrait is hard enough to do exactly the way you want, and doing activities in addition makes it very challenging.

But tonight I can go to bed and just let my dreams take away my bubble thoughts. Tomorrow will be a new day, and I can start thinking about other photo projects that do not include soapy water filled with air....

Wednesday, October 15, 2008

Bubbles - my Nemesis

Sometimes you just got to realize the facts. You'll not always reach your goal, even how many times or how good you try. My attempt on shooting a simple bubble is an example on just that.


My previous bubble shot was a so-so shot, I think. I'm pleased with the lighting, but the shot itself was a little boring, even though I felt that I caught the bubble in the right moment. So, while I was waiting for my wife to get back home this evening, I wanted to kick it up a notch by blowing smoke into a same-looking bubble. "That's gonna be a killer shot!", I thought.


The reason I had to shoot it while my wife was out, was because she can't stand cigarette smoke. Therefore I had some time pressure, since I had to be finished within one hour. Also, I hadn't smoked in eight years, so I was a little anxious on how I would react. I was determined to only fill my mouth with smoke; without any exeption would I inhale.


I set up the lighting almost the same way I as did in the last bubble shot. Three second intervals, reflective umbrella on camera left, same lens and settings. The only difference was the backlighting. I reduced the power by two stops to get a low-key effect to emphasize the fantastic smoke bubble I was about to create....


I lit up a cigarette out on the porch, ran inside with smoke in my mouth, started the camera, assumed the position, counting the seconds for perfect timing and started blowing. These are the problems I ran into:


  1. I had to keep my breath for about 30-40 seconds after I "inhaled". It doesn't sound like much, but doing the things above at the same time in addition to the time pressure was a big challenge for me.
  2. It felt like the smoke was sort of pushing down my throat, which almost made me vomit every time. Remember, it was eight years since last time, and I was not used to this at all anymore.
  3. It looked like the hot smoke made the bubble break up much faster than without making it almost impossible to fill a bubble in the same size as the last bubble shot.
  4. Performing a nice and calm expiration of the smoke was very hard, since I was both out of breath, almost vomiting and trying to blow at just the right time.
  5. While blowing, a lot of smoke did not enter the bubble, but insted wrapping around both my face and bubble which literally contaminated the photos.
  6. The interval timer menu always turned off by the time I came running from the porch. I had to 15 keyclicks on the camera to start the timer with the smoke in my mouth.
  7. I only got one shot for each smoke expiration (That caused me to do a lot of running and lighting up a total of six cigarettes)
All these challenges came in addition to the pose and positioning, which alone was hard enough in the last bubble shot. So I just dropped the idea of getting the correct crop in camera and continued.

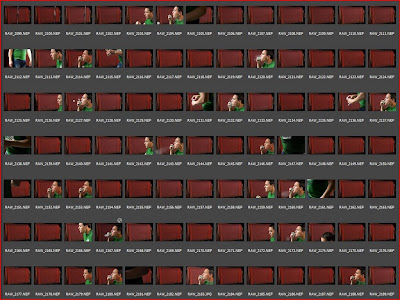
Here's a screen dump from Bridge, showing all the photos that were taken until my wife got back home:


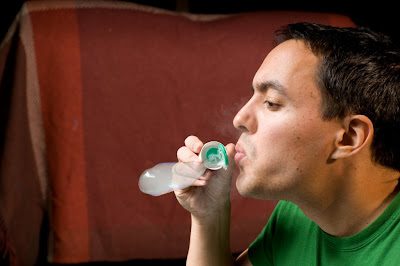
Of all these 90 shots, I got ONE shot where the bubble actually shows filled with smoke. The straight-out-of-the-camara RAW file:


Problem is that it looks like I'm blowing into a condom... How charming is that? And look at that awful background. I wanted a red backdrop and that lousy brown-red blanket was the best I could find. My hand is so distracting behind that condom bubble that it takes the attention away from the bubble.

This meant only one thing: "TO THE PHOTOSHOP MOBILE!"

I played with a lot of effects in Photoshop: a lot of different crops, duotone, Orton, gaussian blur with overlay blending, BW conversion and grungy hard-contrast look. I ended up with a mix between the BW conversion and the hard-contrast look which is pretty much the same as the Contre-Jour Amour shot. It's even the same composition. Very imaginative, no?:)

The final version:

Bubbles are my Nemesis

The image is too dark, I think, but leaving it any brighter made it look dull. And the bubble looks even more like a condom. I guess the image has a certain feel to it, but that messed-up bubble ruins it for me.

This shot was a disaster, and I'm just fed up shooting bubbles for now. During previous photo shoots I've discovered that if you just shoot and never quit you'll get that perfect shot in the end. Unfortunately, that end never came. I really should have had an assistant that could operate the camera, eliminating a major challenge. Anyway, it's going to be a long time until I'm shooting bubbles again.

They are my Nemesis.

Sunday, October 12, 2008

Creation of a bubble

The only time I really experiment with different strobe setups and themes is during an assignment shoot. This weeks assignment at dPS was "Bubbles". As we speak, I've posted my previous Marble Drops shot for this assignment since the drops look very much like bubbles, but I felt that it's the definition of laziness, so I tried to make a new shot.

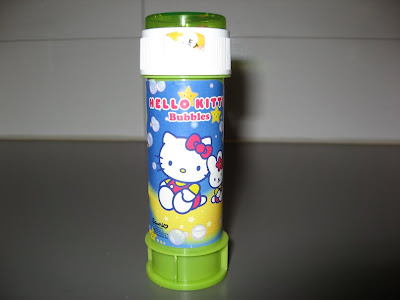
Ok, so the theme was "bubbles". The first thing I did was to buy a soap bubble dispenser at the local toy store. I ended up with a Hello Kitty model:


The store clerk asked if he should wrap it in gift paper, but I said: "No, it's for me". First time he's seen a 30 year old man buying soap bubbles for himself?:)

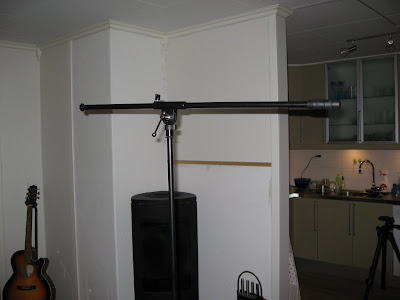
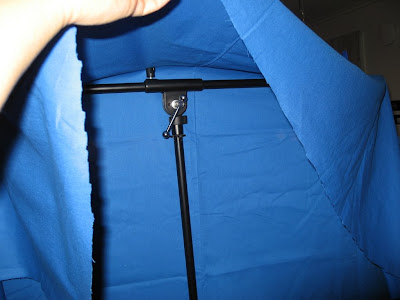
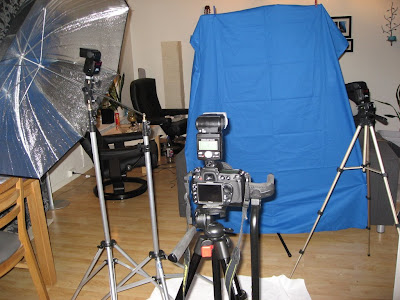
I wanted a fresh background for the bubbles, so I hung a blue fabric bought from Ikea over my microphone stand. (This mic stand is probably one of my most helpful props during these strope shots. I've used it almost everytime, holding umbrellas, flashes, fabric and of course a microphone...)


I wanted a strobe to light up the backround so I set up a bare flash pointing at the fabric from a about 45 degrees from the right side (camera right). And while I did that, I discovered something that I've never thought about before:

I use CLS for triggering the external flashes. That means that the flashes are controlled with optical signals from the commanded flash on the camera. About a millisecond before the shutter is opening, the commander flash sends out a trigger signal that is received by every flash in the setup. They have a little "window" on one side where the signal is recieved. In this picture it's located on the lower left side of the flash:


One problem I have come over during previous photo shoots is that the flash's window is pointing away from the camera, so that it does not detect the commander's signal, causing it to not fire at all. In situations like this I've instead used the radio controlled Cactus triggers, loosing the ability to control each flash's output from the camera.

I have also known that the flash head can be rotated 180 degrees in the horizonal plane. I feel so stupid... I have NEVER realized that this could be used to make the little "window" turn against the camera! In the photo above, the flash is rotated. I think it will be much easier to set up the strobes just the way I want from now on:) 

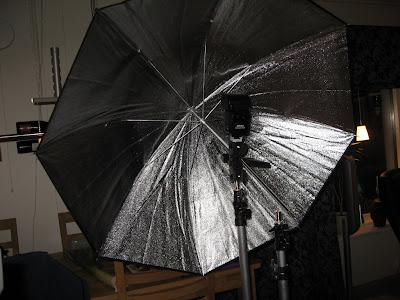
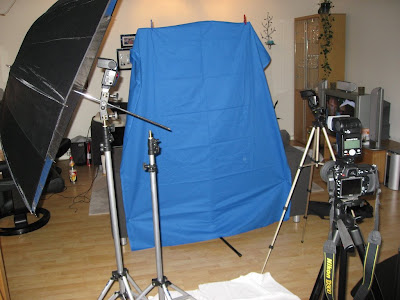
Moving on... With the flash pointing on the background a put up a reflective umbrella on camera left, pointing parallel with the focal plane.


I originally planned to use my wife as model on this photo shoot, but she didn't feel too well, so I had to use myself insted. This made the shot very tricky. I don't have remote control and using a self-timer would be hopeless. Trying to catch the perfect bubble shot with a self-timer in a self-portrait would take ages! So I had to figure out another way of doing it.

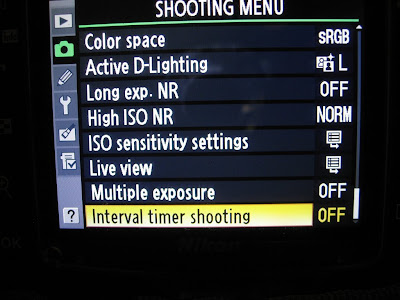
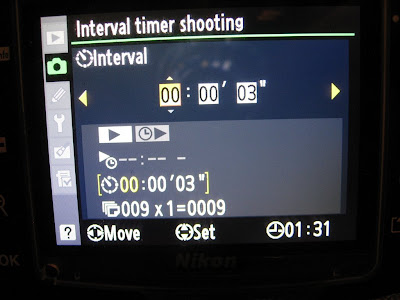
I must admit that the Nikon D300 has a lot of functions that I haven't studied yet, but while searching trough the menus I found a function called "Interval timer shooting". That sounded too good to be true! At first it looked a little complicated, but it's pretty logical. I wanted to shoot several shots with a 3 second interval (to avoid flash misfire). Here's how that's done on the D300:

From the Shooting Menu (the camera symbol), choose INTERVAL TIMER SHOOTING:


To start shooting right away, choose NOW and press the the RIGHT arrow:


Enter the time between each shot, in this case 3 seconds and press the arrow:


This screen made me a little confused, but here you enter how many intervals the camera should run AND how many shots to be taken for each interval. I wanted a total of 9 intervals (and only one shot for each interval. Then press the arrow:


If you want to just save these settings, press NO. When you press YES the camera starts shooting automatically. You don't have to use the shutter button at all:


Now I could finally take several pictures of myself without a remote. Now I just had to figure how to fit myself in the frame. One thing I should mention is that nowdays I'm trying to get the crop I want in-camera instead of doing that in PP. The reason is that I want to use the full resolution that my CMOS sensor can provide. I planning to shoot stock photos later and it seems that bigger is better.

I took out another light stand and placed the top of it at the height and distance from the camera that I wanted my mouth to be at during the shoot. I autofocused on this and turned the knob to MANUAL FOCUS. This way the camera won't focus for every interval, making it easier to time the bubble blowing.

Now that I've found the Y-axis an Z-axis for the position of my mouth, I put another stand next to the camera, indicating the X-axis for my mouth. I could now walk in front of the camera and just make sure that my mouth is positioned in the intersection between those two stands. There's nothing wrong about utilizing triangulation in a photo shoot:) In the photo below you see the first stand is placed in front of umbrella stand and the other stand is to the right of the camera:


Finally I could start making bubbles! I thought.... I hadn't adjusted the exposure at all. I was so caught up in the setup that I completely forgot that...

I wanted a wide aperture to blur the backround so that only me and the bubble would be in focus. I didn't want any motion blur in the bubbles so I chose the maxiumum sync speed. These are the final settings:

Background flash: 1/64th power @24mm zoom
Umbrella flash: 1/16th power @24mm zoom
Exposure: 1/250 @ f4 ISO 400
Lens: Nikkor 50mm f1.8D AF

Now I could start shooting, and shooting I did! I got so many poor shots in the beginning. I realized that I haven't blown soap bubbles in years and figuring the right amount of "pressure" took about 30 pictures.

Here's the photo I ended up with, showing the bubble the moment before it lets go. This is the RAW file with exposure adjusted in Camera Raw:


Observant readers have probably noticed that I didn't iron the background fabric prior to shooting. It's not a slip, just laziness. I was hoping that I could blur out the background with a wide aperture to smooth the wrinkles. But as wise people say: "A wide aperture is no substitute for ironing". This caused some unnecessary work in Photoshop. I had to isolate the background and Gaussian blur it like there was no tomorrow. Still there are some wrinkles left, appearing like darker areas on the fabric. But anyway, lesson learned! Other PP I did:

  • Smoothing the skin by selecting highlights and blur them a little
  • Removed some dark spots on my skin
  • Increasing the blues a little
  • Added vignette
  • Sharpening
So this is what the result looks like:

Creation of  a bubble

Creation of a bubble

I don't think it's worth using in the bubbles assignment, but if I'm not getting a better shot withing Tuesday, I'll probably use this or the marbles shot.

What I could have done differently:

  • Used another model to get it just perfect. I could have experienced more with different angles and persectives and the model would maybe have a smoother skin:)
  • I should have shaved... Those stubbles doesn't look too good!
  • As mentioned I should have ironed the background to avoid too much PP work.

Tuesday, October 07, 2008

Marble Drops

This week's assignment on dPS was "Texture". I have been shooting a lot of photos with texture lately. These mostly involves wooden surfaces. But this time I wanted to do something different.
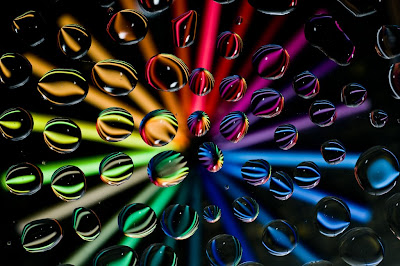
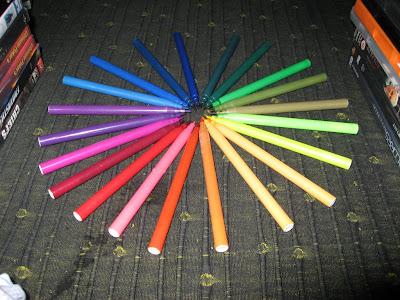
A friend of my told me about a shot he had seen some years ago, with water drops on a glass plate. Under this plate some pencils were spread out in a star shape. I thought that sounded really cool and wanted to do something similar.

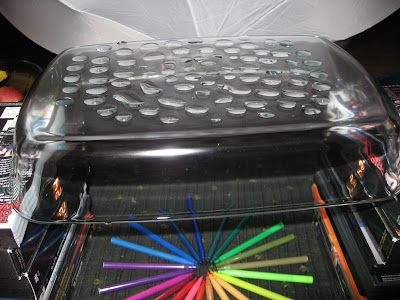
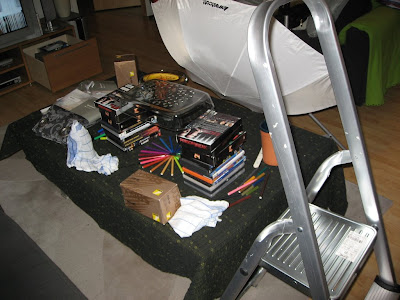
I didn't have a glass plate but after some searching in our kitchen drawers I found a large bowl with a flat base. I thought that the pencils had to be outside the depth of field so I put this bowl on top of some DVD covers so that I got some space between the bowl and pencils.


I didn't have all the pencil colors so the color wheel wasn't complete, but to drive to the store to buy more pencils would be insane...


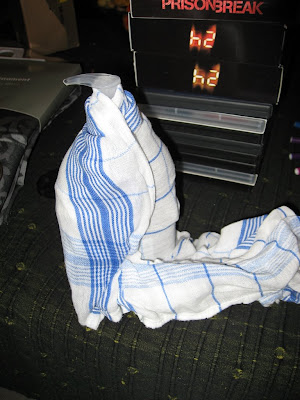
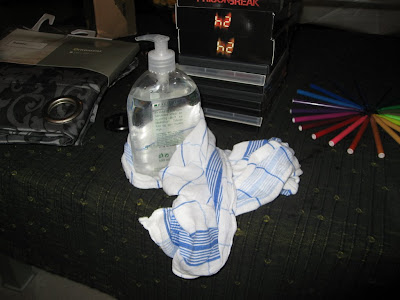
I thought I was on a roll. The setup was almost too easy. Of course I bumped into a big problem: the water drops. I didn't have any equipment to make water drops. A pipette would be perfect, but we didn't have any. I searched every corner of the house to find something, but no. The closest thing I found was a soap dispenser in the trash. I had to wash it for 30 minutes just to get all the soap out of it. Still that wasn't enough. But I was impatient so I thought I just had to deal with it.

I filled it with water and tried to make small water drops. It was an awful tool to work with. It wasn't completely watertight so it poured water everywhere. That's not a good thing when you want to control the flow of water.


Caution: Nudity in the photo below:


I didn't count the time, but two episodes of King of Queens ran in the background before I finally got a pleasing arrangement of water drops. Easy math:) A tip: It was easier to use cold water than hot water. The water seemed less liquid in a cold state so that they didn't mix very easy.

OK, now with everything set up it was time for the fun part: The lighting. I didn't have any plan for that, but I wanted to try soft lighting first. I mounted an umbrella close to the pencils and did a manual test shot.


Suprisingly it looked good and I hadn't done any adjustments to the camera nor the flash... I was afraid that the top of the umbrella would ruin the whole scene but no glare was visible:) Still I wanted to tweak the settings and ended up with the following:

Flash: 1/16 power @ 24mm zoom
Camera: 1/250 @ f/4 ISO 200
Lens: Nikkor 50mm f/1.8D AF

Finding the right aperture was tricky. I wanted as much of the drops in focus but still I wanted the pencils to be as blurry as possible. f/4 was a good compromise.

I did a couple of shots with different angles and heights and ended up with this shot ("straight out of the camera" RAW file)


After adding some blacks in Adobe Camera Raw I imported it to Photoshop and did the following:

  • Increased the brightness a bit in Levels
  • Increased the contrast in Curves
  • Added a vignette with the Lens distortion tool

The result:

Marble Drops

Marble Drops

What I could have done differently:
  • Bought a pipette. I would have had much more control of the water drops and the shape so that they would have been more or less circular and uniform. I think the "pencil star" would be more visible in each drop that way.
  • Increased the height between the pencils and the glass bowl so that the pencil would become more blurry.


Monday, September 15, 2008

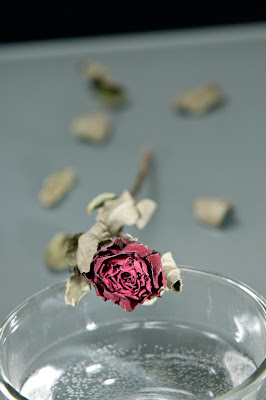
A very thirsty rose

Today I wanted to use my strobes again. I had planned to take them outside for some on-location shooting, but my model wasn't available so I'd try a still-life shot (again).

First I tried to shoot some water shots (things falling in a bowl of water, water drops etc) but I didn't have a large enough glass containter for the shots I had in mind. Then I took out some colored glass-vases and lit them from above, from the side and below, but the results weren't pleasing. (Maybe one of them got a little interesting, but I'll describe it in another post).

I was about to call it the day, when I discovered a bouquet of dry roses hanging on the wall. I don't like to shoot flower shots if they don't have a story, but I thought I could make one with a dry rose. Hoping that my wife wouldn't get mad, I out one rose from the bouquet. Last time I took a rose from her, she wasn't too happy...

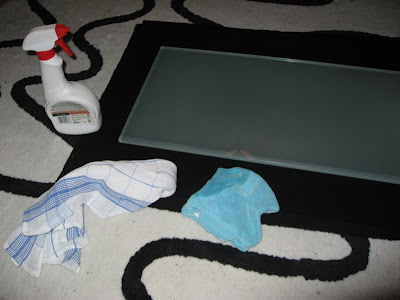
As I mentioned, I didn't have any plan for how to shoot this rose, but reglardless I needed something to put it on. I took out the glass plate I used in the raisin shot and wiped it clean. This is very important. Dust and fingerprints does not look good during a strobe attack, so keep it nice and clean. The black cloth was used for background.


I put the rose on the plate and mounted an umbrella with SB-600 on camera left and a bare strobe on camera right for fill. Here are some straight-out-of-the-camera (SOOC) examples:


So what did I learn by taking these three shots?
  • Soft light is not suited for a dry rose. I thought it looked too boring and needed a little punch. So I decided to snoot both strobes to create some strong shadows.
  • The rose just laying there was pretty boring, so I removed it leaves. Still a little boring. A bowl of water was standing right next to me (after the water shot attempts in the beginning) and I thought that a dry rose might want to drink water? Finally I had the story I was looking for!
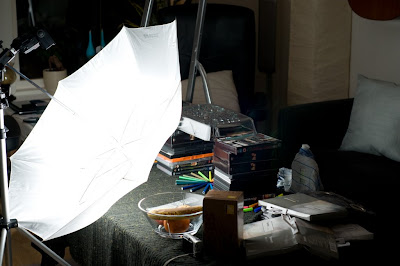
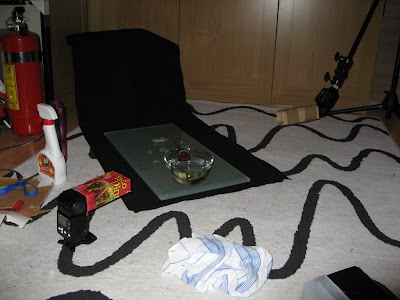
I removed the umrella, put the flash on the floor (to create longer shadows) and made a new Taco Dinner cardboard snoot for the camera left strobe which lights up the rose. This is the final setup:


The reason why the flash to the right is upside down is because the light sensor for remote triggering is closest to the camera. I was too tired to experiment with manual flash output and relied only on TTL... 

After some test shooting, I came up with these settings:

Right strobe: SB-600 85mm zoom, TTL -0.7
Left strobe : SB-600 85mm zoom, TTL 0.0
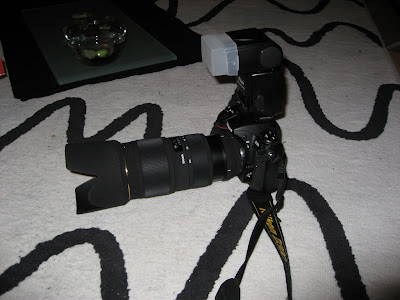
Lens: Sigma 70-200mm f/2.8 @ 102mm
Exposure: 1/250 @ f/5, ISO 200


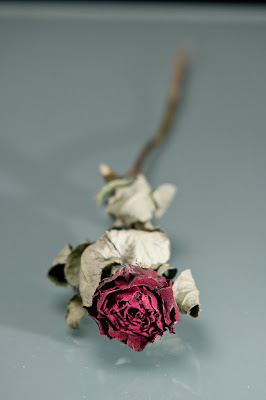
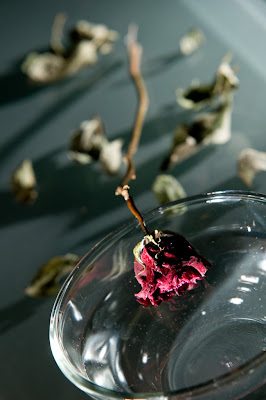
Finding the right angle and crop was so hard. I was extremely tired, my wrist was hurting and was pretty much fed up with photography due to all the failed attempts earlier this evening. I had never aborted a strobe photo shoot without a result and I certaintly did not want this to be the first. After about 50 shots, I got a shot that I was pleased with.

The SOOC version:


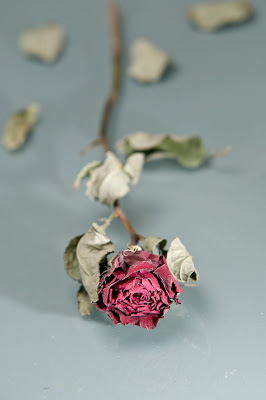
This was done in Photoshop:
  • Added a vignette
  • Desaturated the reds a little
  • Levels adjustment
  • Removed some of the shadows on the rose (don't tell anyone, OK?)
The result

A very thirsty rose

After I was done shooting, I had ask my wife why the 3 roses was hung on the wall. She said that they were the roses she gave me on our wedding day...(ops!) When she asked why I wondered about that, I had to tell that we had 2 beautiful roses left...

The next post will be titled "Why photographers need to know a marrige counsellor".

Tuesday, September 09, 2008

Contre-Jour Amour

This week's assignment on dPS was "Contre-jour". That is French for "against the light". The assignment description said that this "exploits lighting and plays with under and over-exposed areas to create a dramatic effect - in other words, the complete opposite to HDR approaches, which try to compress the range of contrast".

I was unsure what to post to this assignment since there were A LOT of different opinions on what this really means. A majority of the submitters wrote in their post that they weren't sure if their photo was correct.  The disscussion went on and on. I'm looking forward to see the winners, which will give us a clue of what "contre-jour" actually is:)

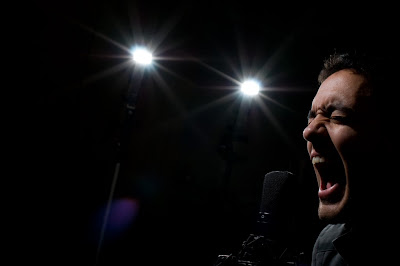
Anyway, taken the description above into account, I wanted to use my strobes again. After a couple of days with thinking, I came to think about those classic low-key concert photos, which has a lot of dark (underexposed) areas in addition to stage lights (overexposed) with the artist as the focal point. These photos, at least those I'm thinking of, has a very high-contrast look, which I wanted to recreate.

Unfortunately, I didn't have a stage. Only a small computer room. I mounted three SB-600's in a row wich would function as the backlights. And my last Speedlight, the SB-800, would fill the artist with a snoot. I had to fire all these with Cactus triggers. I mounted the microphone on the microphone stand and did a test shot. To my big surprise, it appeared like one of the Cactus recievers had a malfunction. It triggered the flash constantly and actually drained the battery of the connected Speedlight... (RIP, that one Cactus reciever)

So, since I didn't have enough Cactus triggers left, I had to use the SB-800 on the camera as a commander, and could only use two instead of three stage lights, since I had to use one as a snooted fill flash.

Finally, after some modelling, the setup ended up like this: 


My wife sat to the left in this setup shot and pointed the camera on the stage lights. After some testshots, I ended up with these settings (all-manual):

Backlight: 1/64 power at 24mm
Fill flash: 1/8 power at 24mm (forgot to set it to 85mm...)
Camera: 1/200 at f/9 *)
Lens: Nikkor 35mm f/2D AF

*)I recently read that in order to get a star-shaped sun, use a narrow aperture. I'm glad I read that, because that is the effect I wanted in this shot.

What was important to me was the right facial expression in addition to the composition. I didn't have a specific plan. I just told here to twist and turn the camera for each take. Halfway in the shooting I found out that I couldn't pretend that I was singing. I actually had to scream loud to get that intense look... After 30-something shots I got one that both she and I was pleased with:


Then I had to walk into the digital darkroom. After increasing the blacks and exposure in Adobe Camera Raw, I imported it into Photoshop to add a gradient map adjustment layer. I think this is the best way to do a high-contrast B&W conversion. I also had to erase some lens flare and a part of the light stand in the background. I felt that a little recomposing was needed too, which was very easy to perform due to the large black areas:)

The final image after editing:

Contre-Jour Amour

"Contre-Jour Amour"

What I could have done differently:
  • I could have tried to light my face from different directions to see if I got some interesting shadows.
  • Tried narrower aperture to create bigger "stars". When I increased the blacks in processing, the stars got smaller.